Most Sony Vaio systems are pleasant and aesthetic. They come with well polished cases of glossy-looking finished works. That is one of the first things to notice about the products. Apart from that they usually come with good quality features and well equipped more often than average systems out there for corporate uses.
The major problem with them is *whizzing fan noise that disturbs when they multi-process information or pressure to run high GPU games, even at times they make much noise when they are not doing much works.
This fan noise can be reduced to barest minimum by anticipating some minor changes. You'll have to notice the noise often times before taking any action to apply these changes.
Before you go about the minor changes know that it is healthy for Sony Vaio system fans to make noise, but when they make noise often times than normal then it is not normal. There are rare cases of bad fan with loose spin which you might be required to purchase new one for a replacement.
The following step-by-step process will help in minimizing the disturbing noise.
Note: Before proceeding with this process it is required of you to have much idea about system hardware. If not, kindly take the system to your Sony Vaio Costumer Care Center and explain this process to them.
STEP 1: Have the right set of screwdrivers available.
STEP 2: Unscrew the system carefully. Start by removing all screws at the back. Remove the ones for the hard disk drive and remove the battery from it compartment or bay.
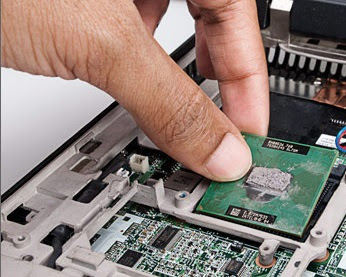
STEP 3: Now carefully remove all the connecting cables and screws for the fan, the micro-processor, etc. Turn the processor bay lock left to unlock it and lift the complete heat-sink with fan and micro-processor.
STEP 4: Dust the fan (make sure it is free of all debris). Brush the vents with soft bristles.
STEP 5: Carefully separate the processor from the heat-sink. It is held by the thermal paste to the heat-sink.
STEP 6: Scrape the thermal paste off the surface of the micro-processor and the heat-sink carefully.
STEP 7: Apply a fresh thermal paste to the scraped micro-processor from where you scraped off the old one.
STEP 8: Attentively place the micro-processor back into its bay and turn the lock clockwise to lock it.
STEP 9: Place the heat-sink(glued to the fan) right at the top of the micro-processor and screw it.
STEP 10: Cover it back and place the screws at their appropriate holes. Make sure they are tightened (not extremely tightened).
STEP 11: Start your system and the noise will become normal.
* The reason why some new Sony Vaio systems make much noise is due to the old nature of the thermal paste or has hardened loosing its cooling effect after long time in stock.


